BMCT II Test Topics & Example Questions
Here we will review the 18 sections or topics of the test in depth. Within each topic you will find a sample question. If you scroll to the bottom of the page you will find the answer key.
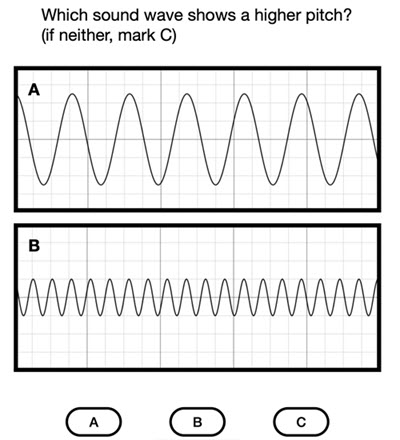
Acoustics (2.7%)
Questions on acoustics require an understanding of sound waves passing through air, liquid, and gas. They test your knowledge on principles like the Doppler effect. They also test your understanding of waves in general and wave basics like refraction or reflection. There are about 1-2 Acoustics questions on the test.
Example:
Belt Drive (4.5%)
Questions on belt drives require knowledge on the different types of belt drives like open and crossed belts, and basic concepts like torque and tension. There are about 2-3 Belt Drive questions on the test.
Example:

Center of Gravity (5.5%)
Questions on center of gravity require you to think about where mass is concentrated in a diagram. You should be able to apply center of gravity to balance objects. You should know if objects would fall over or stay put in the presence of gravity. There are about 3 Center of Gravity questions on the test.
Example: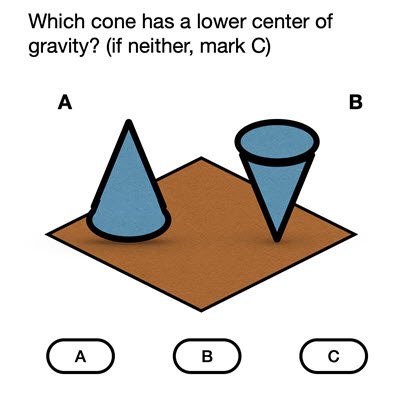
Centrifugal Force (3.6%)
Questions on centrifugal force require you to understand the effects of a rotating object or disc. The direction of centrifugal force and the source of the force are important to answer these questions. There are about 2 Centrifugal Force questions on the test.
Example:
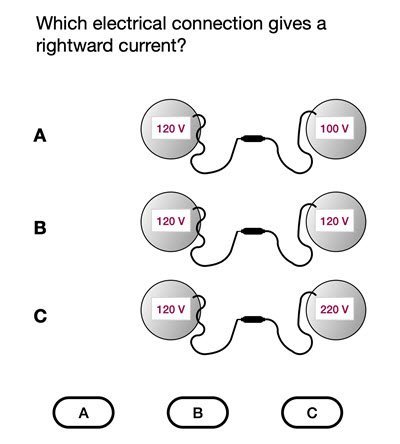
Electricity (5.5%)
Questions on electricity require you to understand circuit diagrams. You should know the symbols for batteries and resistors, and the basic principles like the “path of least resistance” and Ohm’s Law. You should also know the basics of electric charge, electric potential, and resistance. There are about 3 Electricity questions on the test.
Example:
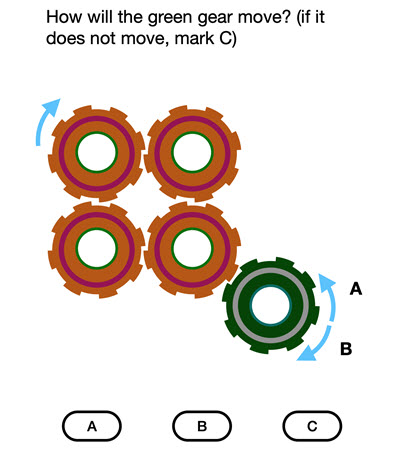
Gears (4.5%)
Questions on gears require you to understand the effect of a rotating system of gears. The direction of rotation, the speed of the gears, and the torque on the gears are all important to know for these questions. There are about 2-3 Gears questions on the test.
Example:
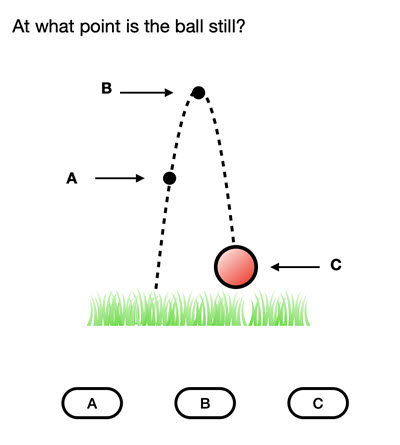
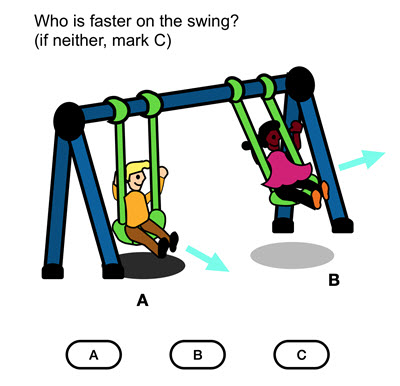
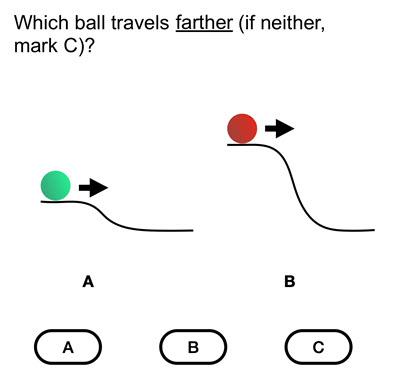
Gravity and Velocity (7.3%)
Questions on gravity and velocity require an understanding of the effect of gravity on an object. Concepts on the law of gravitation and the effect on planetary orbits may be tested. An understanding of potential and kinetic energy is also helpful. There are about 4 Gravity and Velocity questions on the test.
Example:
Heat (5.5%)
Questions on heat require understanding of heat sources and of heat transfer between two temperatures. Additional concepts like pressure, volume, and how to read thermometers and pressure gauges are essential for these questions. There are about 3 Heat questions on the test.
Example:

Hydraulics (10.9%)
Questions on hydraulics require an understanding of fluid flow down a pipe or body of water. Concepts on Bernoulli’s Principle, fluid pressure, and buoyant force are essential for these questions. There are about 6 Hydraulics questions on the test.
Example:

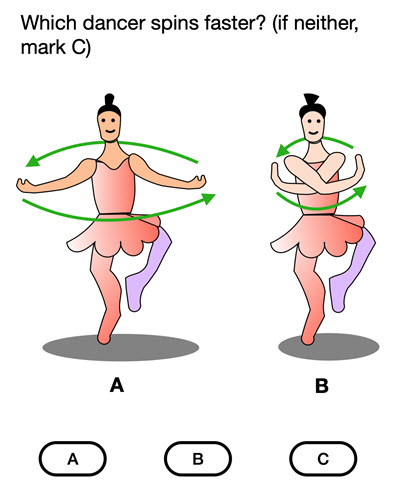
Inertia (3.6%)
Questions on inertia require basic knowledge on the law of inertia (Newton’s First Law of Motion) and the effect of acceleration on an object. It is important to know what inertia looks like in situations of an accelerating vehicle or in rotating objects. There are about 2 Inertia questions on the test.
Example:
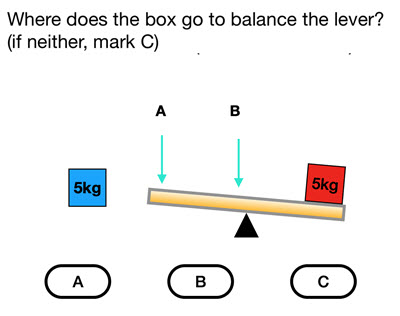
Levers (6.4%)
Questions on levers require an understanding of torque about a fulcrum. Understanding how to balance objects on both sides of the lever and where there is a mechanical advantage is important. There are about 3-4 Levers questions on the test.
Example:
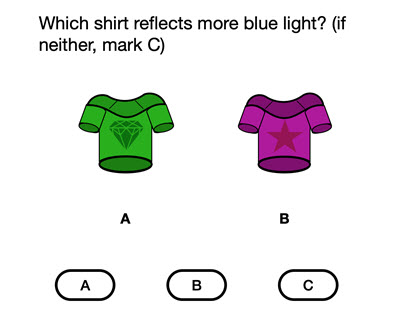
Optics (2.7%)
Questions on optics require an understanding of the properties of light. It also requires an understanding of the types of lenses (converging and diverging) and types of mirrors (convex and concave). It is important to know their images (real and virtual) and their orientation and size. There are about 1-2 Optics questions on the test.
Example:
Planes and Slopes (5.5%)
Questions on planes and slopes require an understanding of the objects that slide or roll. You should understand the difference between potential energy and kinetic energy of an object. Knowing the work needed to push or pull an object across a plane or slope is also helpful. There are about 3 Planes and Slopes questions on the test.
Example:
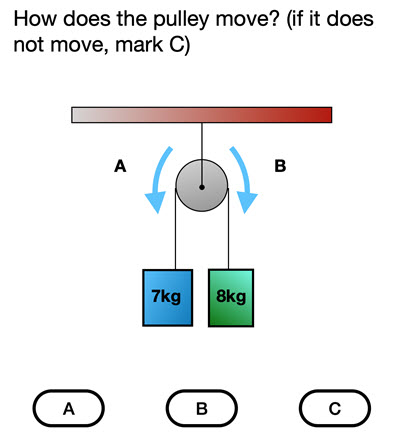
Pulley Systems (6.4%)
Questions on pulley systems require an understanding of gravity on a hanging mass and the tension in the pulley rope. You should understand how to divide the tension. You should also know how much force is needed to pull up the weight. There are about 3-4 Pulley Systems questions on the test.
Example:
Resolution of Forces (3.6%)
Questions on resolution of forces require an understanding of vectors and force as a vector. You should understand that forces could always be broken into two parts: one horizontal part and one vertical part. In 3D space there is a third part. It is important to know what direction the force points in the horizontal axis (left or right) and the vertical axis (up or down). It is important to see if forces cancel. It is helpful to draw a triangle with these questions if you need it. There are about 2 Resolution of Forces questions on the test.
Example:

Shape and Volume (5.5%)
Questions on shape and volume require you to know the volume of a cube, cylinder, sphere, cone, rectangular prism, and triangular prism. You should memorize the formula for these volumes and apply them to the problem. There are about 3 Shape and Volume questions on the test.
Example:

Structures (5.5%)
Questions on structures require you to understand how an object is put together. You must apply what you know about forces, torque, slopes, levers and more to answer these questions. There are about 3 Structures questions on the test.
Example:

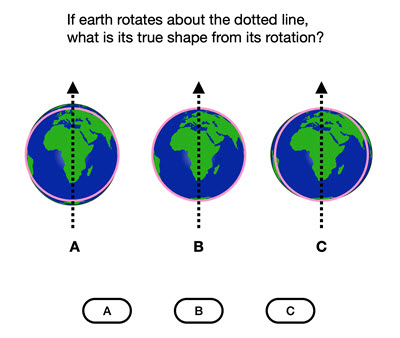
Miscellaneous (10.9%)
Questions on the miscellaneous section are a random choice. They will be made up of topics that we have already discussed or of a special topic in physics and mechanics. There are about 6 Miscellaneous questions on the test.
Example:

Summary of Content and Structure
As you see, there are some topics that show up more often during this exam. Hydraulics and Gravity and Velocity make up the largest areas of the test if we don’t count Miscellaneous questions (remember that these are random questions and can test many mechanical or physical material). The Pulley Systems and Levers sections are the next largest. It is important to study these topics carefully for the exam. After the Hydraulics, Gravity and Velocity, Pulley Systems, and Levers sections, there are 12 other sections to study. The best way to do well on the exam is to study each of them with equal attention. Just study a little more with the larger subject areas we mentioned.
Final Answers:
Acoustics – B
Belt Drive – C
Center of Gravity – A
Centrifugal Force – C
Electricity – A
Gears – A
Gravity and Velocity – A
Heat – A
Hydraulics – B
Inertia – B
Levers – A
Optics – C
Planes and Slopes – B
Pulley Systems – B
Resolution of Forces – B
Shape and Volume – A
Structures – B
Miscellaneous – C